


 |
|

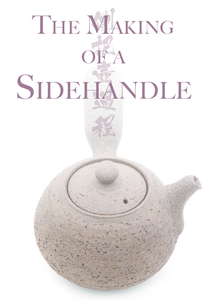
Allow me to invite you into our ceramic studio once again! The excursion will be more visual this time, as I offer a step-bystep presentation of how sidehandle teapots are made. No dry chemistry or too many technical details from a potter's handbook this time, just craft, pure and simple. But before we start, I'd like to contextualize this process, sharing my story of how I got started with sidehandle teapots and some of my thoughts on them.
As some of you might know, I started with my ceramic journey almost twenty years ago. From the beginning, tea and tea culture heavily influenced my body of work, as I was a tea lover myself. Then till now, I am inspired by tea and clay together as one, creatively and personally in my practice. My first teapots were bigger, Western-style teapots with traditional back handles. However, early on in my journey, I visited all the tea rooms nearby, and I was touched by the Japanese Tokoname kyusu teapots I found in some of them - not touched in a positive way, but more inspired to create. Actually, I didn't like the kyusu I saw in particular; however, what I saw as the "strange," "nonconformist" handles were really cool and sparked something in me. (Please remember, it was many years later that I even heard the word "Internet," and there were no tea or teaware books, or great magazines like this, around anywhere.) There was not much of the authentic tea culture in our part of the world, which is probably the main reason why I didn't like the kyusu I saw at teahouses here in the Czech Republic: they were cheap, factory-made, boring examples of what I later learned can be magnificent creations. At the time, I even spoke frankly with the owner of a tearoom about the low quality of the pots, and he agreed, arguing that cheap teaware was needed for beginners, as most vendors are sadly wont to do. Of course, now I know there are very beautiful, well-crafted Tokoname teapots. The fact is, I was young, and, as is the case with too many young people, I thought I knew best. After my complaining, one teahouse owner challenged me: "Okay then, if these kyusu aren't up to your standards, make some for us yourself, and we shall see what's what!"
Obviously, my foot was in my mouth now - making kyusu was not as easy as I thought! There are so many details to pay attention to (I will try to point out a few in my step-by-step demonstration later on). Just as my Western teapots were slowly becoming more and more functional, this new venture, trying to make sidehandle pots, might as well have come from another world. The honest truth is that my skills were not up to the challenge yet. There were many attempts that didn't even make it to the kiln: dysfunctional or ugly. But I was determined - the gauntlet was down! Over the years, I always tried a few with every new batch of teaware, and slowly, over time, created one out of every ten pots I made. As my skills improved, I started to understand sidehandle pots, and learned to apply that knowledge and skill to the creation of my teapots.
And then I met Wu De and this Global Tea Hut community, which reset my understanding of sidehandle pots to the good old "beginner's mind," offering a new perspective. Wu's approach to using sidehandle pots was totally different from the Japanese tradition I knew. The core principles of "Tea as medicine" and "Tea as service" needed to be expressed in a piece of teaware. I opened myself to be inspired, listening to the community's needs and tuning my skills accordingly.
It is not so easy to describe the main shift in my approach to sidehandle pots. While there is nothing wrong with using such pots in casual, friendly, daily tea drinking, if you designate a teapot as the centerpiece of a ceremony, things change! You realize that such a pot is going to be handled with care and respect, which gives you a sense of responsibility. Each of these teapots will participate in and facilitate very precious moments that are changing the lives of many people. Suddenly, it is not so much about my artistic/creative self-expression. Such pots are beyond me, taking on a life of their own. They are practical tools and instruments in rituals that hold secret and sacred moments of Earth and Heaven uniting. The more I participate in and appreciate such moments in my own experience, the more I understand and work towards creating pots that embody this practice. Tea and clay both show us the way quite plainly - if we are listening. Brewing tea in a sidehandle pot, pouring the liquor into our bowls: how simple, how mundane; and yet, there is nothing more profound.
When people ask how much time I need to make a teapot, I usually explain that there are so many small steps, and I work on multiple pots at once, so it is difficult to give a simple answer. I like to work on a few pots over a few days, with some other tasks between and after firings. The following pages show the procedure I use to make sidehandle pots. I hope that you understand the process more clearly after seeing the pictures!
Over the years, I've settled into using just a few clays for making sidehandle pots: Those which are not only nice to work with, but, more importantly, I am also pretty confident work well with tea. The Czech Republic is very rich in clays, so we source most of our clay from local vendors. They are ready to use; though sometimes we mix a few clays together, playing with color and texture. In the photographs, you can see fine, iron-rich stoneware. This clay is very smooth and friendly to my hands. I love the variety of colors and heavy reduction firing this clay offers. As for its relationship to tea, this clay is dense and so maintains temperature very well. Also, in my experience, iron-rich clays are generally sweeter and smoother with most kinds of tea.
As our friend likes to say, "Throwing is a potter's reward!" When you know how, it is very simple (getting to this point is another story). When throwing something so familiar as the body of a teapot, I have only the simplest idea in mind as a sketch, letting my hands and the clay do the rest: becoming the pot that was inside all along.


Trimming and assembling is where most of the magic happens. Every single step in teapot production has a timing. I usually start the trimming on the second day, after the clay has had a chance to harden to the proper firmness - not too wet or dry to work with. During the throwing, I go with the flow as much as possible, but trimming is less in the heart and more in the mind, focused on details. It is a bit like lathe work: You cut out all the superfluous material, changing the shape and texture with every shaving. You cannot get any trimmings back, so care is needed. Consequently, I spend twice as much time trimming as throwing.


This is probably my favorite step in making pots. When all the pieces that I am working on are trimmed, and in the right stage of drying, then this joyous process can begin. I prepare my favorite tools, clean my workspace and let my mind and body work together, aiming for the best results with what I have. Sometimes, I assemble ten, or even more, teapots in a row! It is not unusual for me to work on one pot for a bit, then start on two or three others before returning to the first one to finish the fine details, like refining the handle or spout. When all is done, I cover all the pieces with plastic and let them dry slowly.

Before firing, when the pots are dry, I pick them up in my hands again, spending from ten minutes to half an hour with each. I fit the lids, clean the sieves and all the edges, and check the curves and balance of each pot.


We bisque fire all our pots in an electric kiln set to 1000 °C. With some clays and pots, this step is necessary, while others could technically be fired just once to the final temperature, but this bisque firing makes the whole firing process easier for us. By the time the pots reach 1000 °C, the clay will have already changed to ceramic, and all the organic materials will have burnt up. Then, we have porous, strong pieces, which can be evaluated to determine if they should be finished, decorated, glazed or polished before the final firing.
This could also be thought of as the final inspection. With teapots, I clean with sandpaper, smoothing all the edges and sieve holes, and then fitting the lids again. If you allow any imperfection at this point, it will be there forever. This is the part of teapot making when I pay the most attention. Even tiny details that nobody would probably notice, I try to see, and if my skills allow, I will work on refining every detail, no matter how minute.
Most of our pieces are fired in one of our wood kilns. (All the details of this process would be a whole other article - perhaps in a future issue!) This is the crown of all this work; it's quite complex and always full of excitement and joy. It all starts with loading the kiln, which takes one very long work day (if all the pots are already cleaned, glazed and ready). Then, the kiln is lit, in order to preheat for some hours or overnight. The temperature slowly rises for fifteen to twenty hours. The kiln stays closed tight, cooling down as slowly as possible over at least three more days. Then, a small window into the still-warm kiln is opened: first, a peek, then the first pieces are pulled out. Unloading is a day of celebration for us!


The next day, when everything is out of the kiln and resting on tables and in boxes in our kitchen, the final cleaning and sorting can start. Sidehandle pots often have ash and dust from the firing and need to be cleaned. The lids also have to be cleaned, and possibly adjusted to fit right. If there are any rough spots or details, fine sandpaper is used to polish the pieces under a shower of water. All the clean pots are set aside to dry, ready to send to some tea lover somewhere in the world.


When I think about the whole process of creating sidehandle teapots, and about my role in their creation, I am extremely grateful. When you know how to do it, the process is simple, but each and every pot really took me twenty years to create! With every single pot I take out of the kiln, I accept the results and celebrate the perfection of imperfection (wabi). However, I also see all the things that can be improved the next time, leaving room for growth. And I feel that gratitude for all the support I receive from you is an important part of my development. All the pots I am making now would not be here if it weren't for the tea brothers and sisters using the ones I've already made. Your support furthers this journey, bowl by bowl.


